How can I create a new payment order?
You will learn how to create a cross-border payment and receive instructions on how to add funds to your account in this section.
Step one: log into your account to create the order
Start by signing into your account here. If you don't currently have an account, you can create one here for free; registration typically is quick and easy, and after your application has been approved by compliance, your account can be switched to active.
The primary dashboard, from which you can access the platform, is where you'll be when you log in. You can create new payment orders on the exchange page by clicking the New Exchange button, which will lead you there. Even though you may create a new exchange instruction without any funds in your account, we advise clients to make a transfer first. Payment orders won't be carried out until the necessary funds are available.
Step two: transferring funds to your Freemarket account
You must move funds to your Freemarket account by accessing the add funds page, which is situated beneath the user details in the upper right corner of the website. Select the currency of the funds you want to exchange from the add funds page, and the necessary bank information will then show up on the screen.
You'll get an email confirmation with a breakdown of the transaction as soon as the funds are in your Freemarket account. You can create an a cross-border payment at this point (via the main menu navigation time).
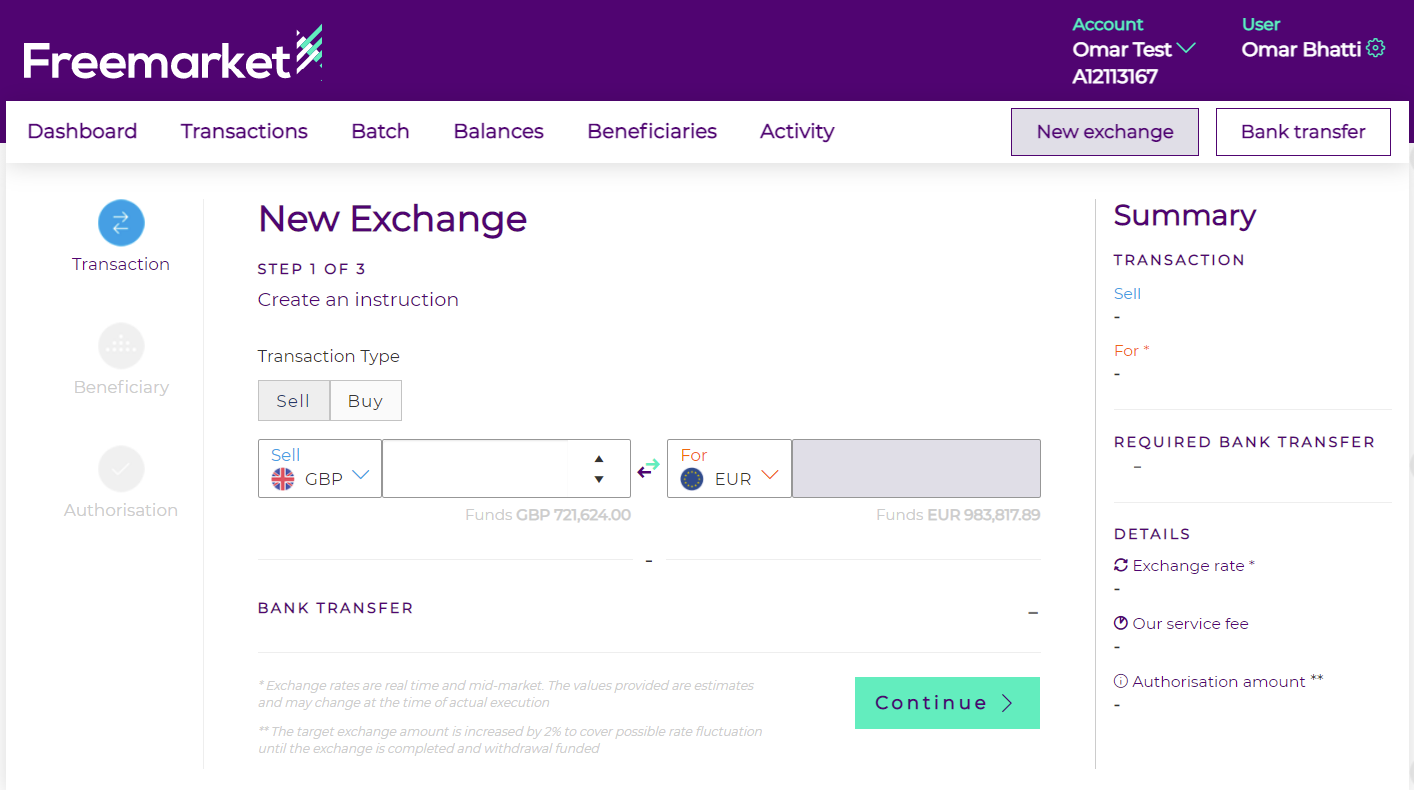
Step three: creating a new payment order
We should discuss two components of the order. Depending on your needs, you can buy or sell currencies here. An overview of how the Buy and Sell capabilities and procedures work may be seen below.
Then, you'll be prompted to pick the 'Transaction Type,' with the option of Buy or Sell shown to you on the screen. Choose Buy if you are buying (for example, I need to buy approximately $20,000 using the equivalent amount in GBP). Choose Sell if you want to sell (for instance, I have £15,000 and want to convert it to the equivalent in euros).
You'll then be asked to provide the amount you want to sell or buy as well as the two currencies you'll use. You can see the available funds in the selected currency instantly below after choosing the currencies you wish to trade. Here you’ll be able to see the current exchange rate for your chosen currencies.
Keep in mind that this exchange rate is indicative and not guaranteed. For additional details on this, please see our Scheduled Exchanges page.
You'll see the option to use your existing funds immediately after the "required funds" information, which indicates how much the exchange will cost you. If you sent funds before preparing your exchange instruction, as we advise, it will show up here. If you didn't, if you want your exchange to be successful, you will need to transfer funds after creating the payment order.
The "Transaction Summary" is located on the right and includes the amount you are buying or selling, the exchange rate, the processing fee, the potential gain (the amount you could save on this transaction, depending on exchange rate fluctuations), and the required transfer. Also, you can decide here whether or not you wish to use the amount you already have.
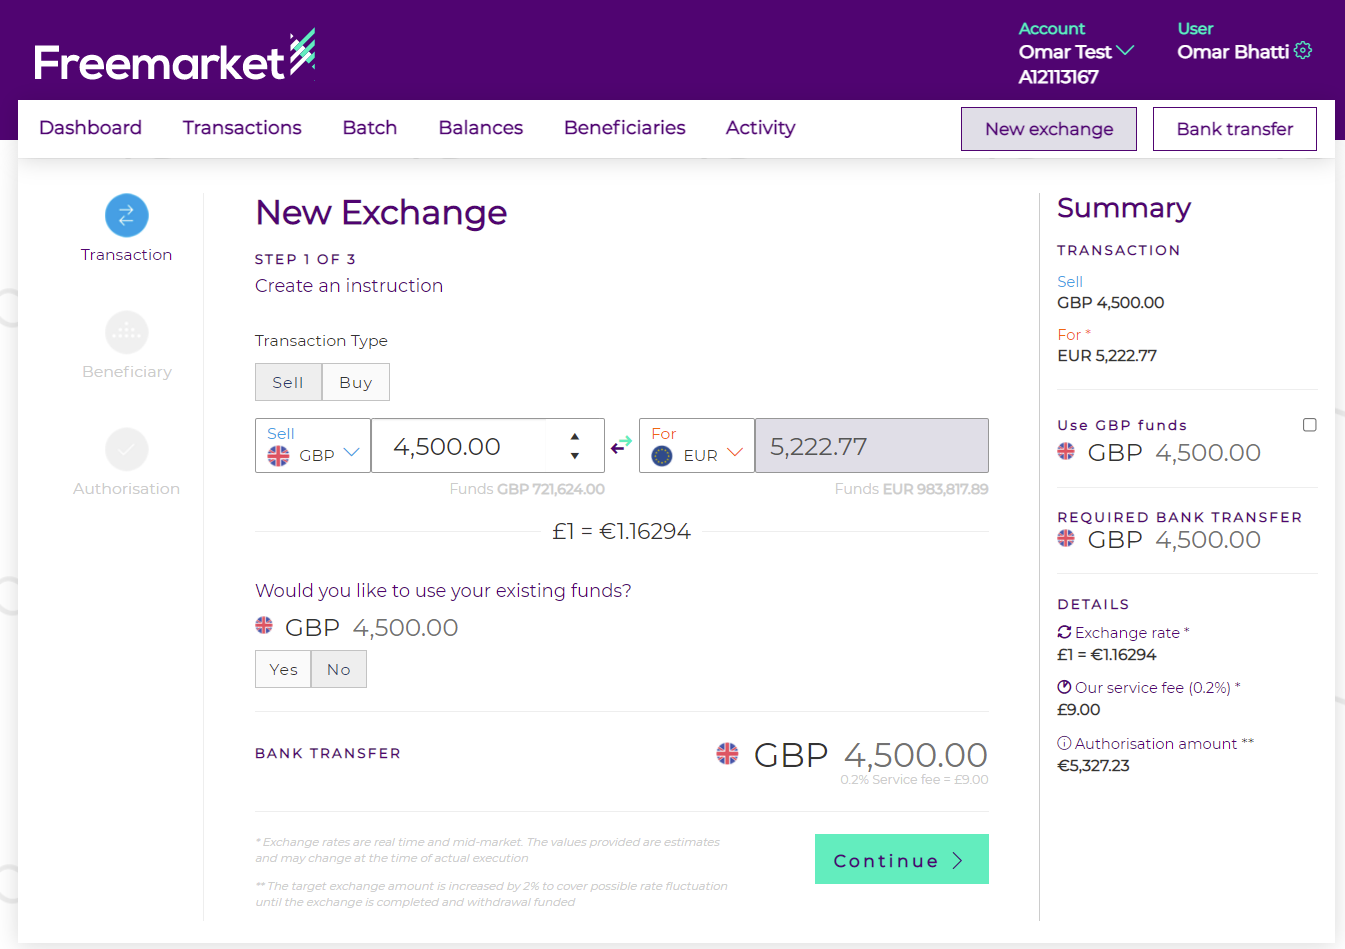
In light of the aforementioned details and in order to get ready for the trade, let's go through the process of creating and concluding an exchange. Start by deciding whether this is a Sell or Buy order (it will be a Sell by default).
Choose the two currencies that will be used in the exchange next.
If you wish to sell a certain currency, for example, "I have £4,500 and I want to convert it to euros," your instructions would be as follows:
If you are buying a certain amount, such as, "I need to purchase €50,000 using Sterling to settle a European invoice," your order would be formatted as follows:
Note: the minimum exchange cost is the equivalent of £5,000 in another currency.
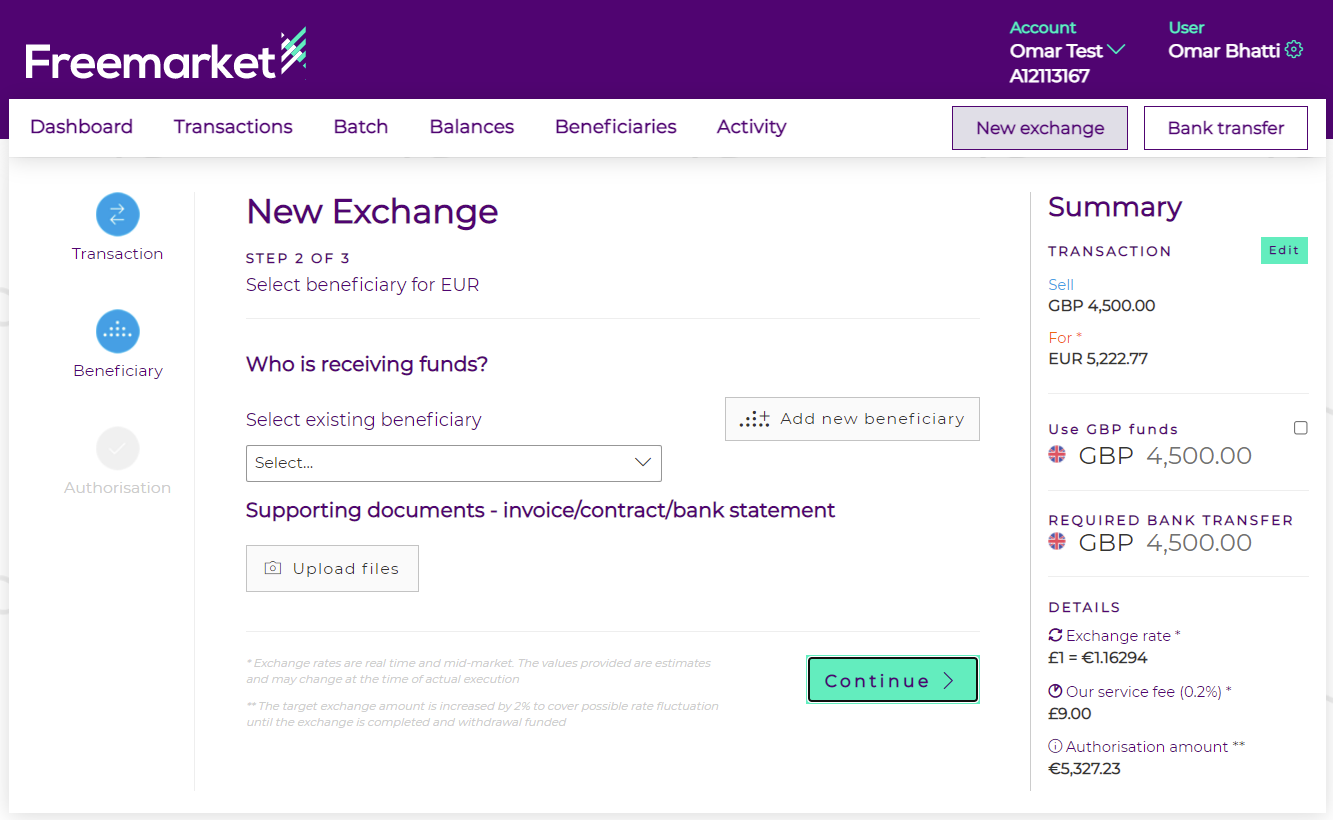
Step four: creating a beneficiary
The beneficiary selection page will appear after you complete the next step.
From here, you can choose an existing beneficiary or add a new one to determine where the funds will go. You might be new to exchanges, so let's start by adding a new beneficiary:
Then select "Create new beneficiary."
Remember that you're able to easily click on the icons to the left of the page to return to the "Transaction" page.
In the field that appears, type the account name of the chosen beneficiary, then choose the beneficiary's nationality.
Further input fields that are specific to the chosen country and currency will show up once the country has been selected.
You may additionally supply a payment reference and/or a description (optional).
Finally, you should choose transaction's rationale from the drop-down menu.
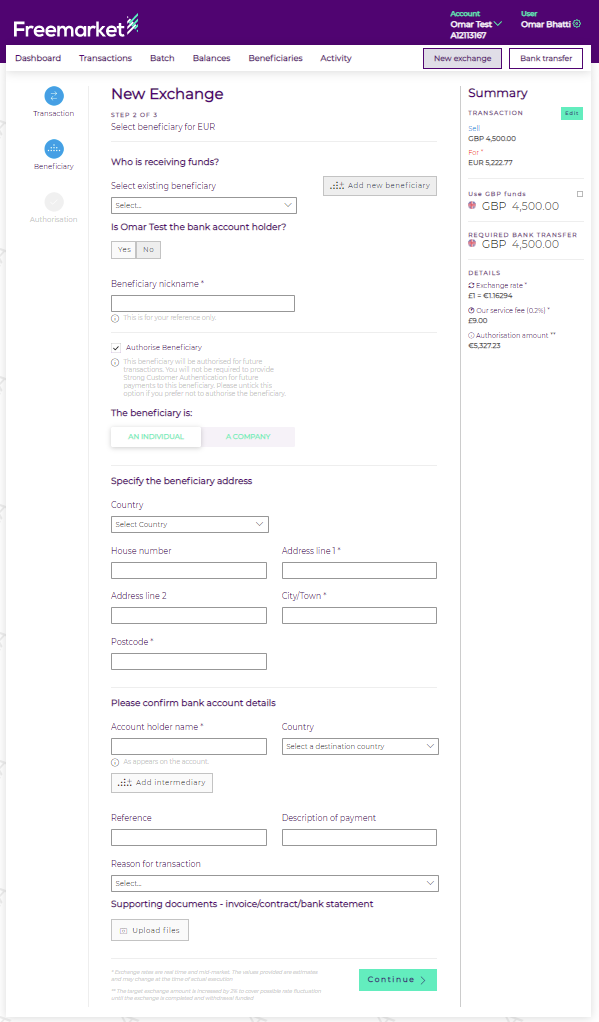
To carry out your exchange instruction, click "Continue" at the bottom of the page after you've completed out all the necessary fields.
You will be requested to choose your bank if you have insufficient funds to complete the exchange or haven't transferred any funds (where your funds are coming from). Choose "Other banks inc. International" if your bank is not listed.
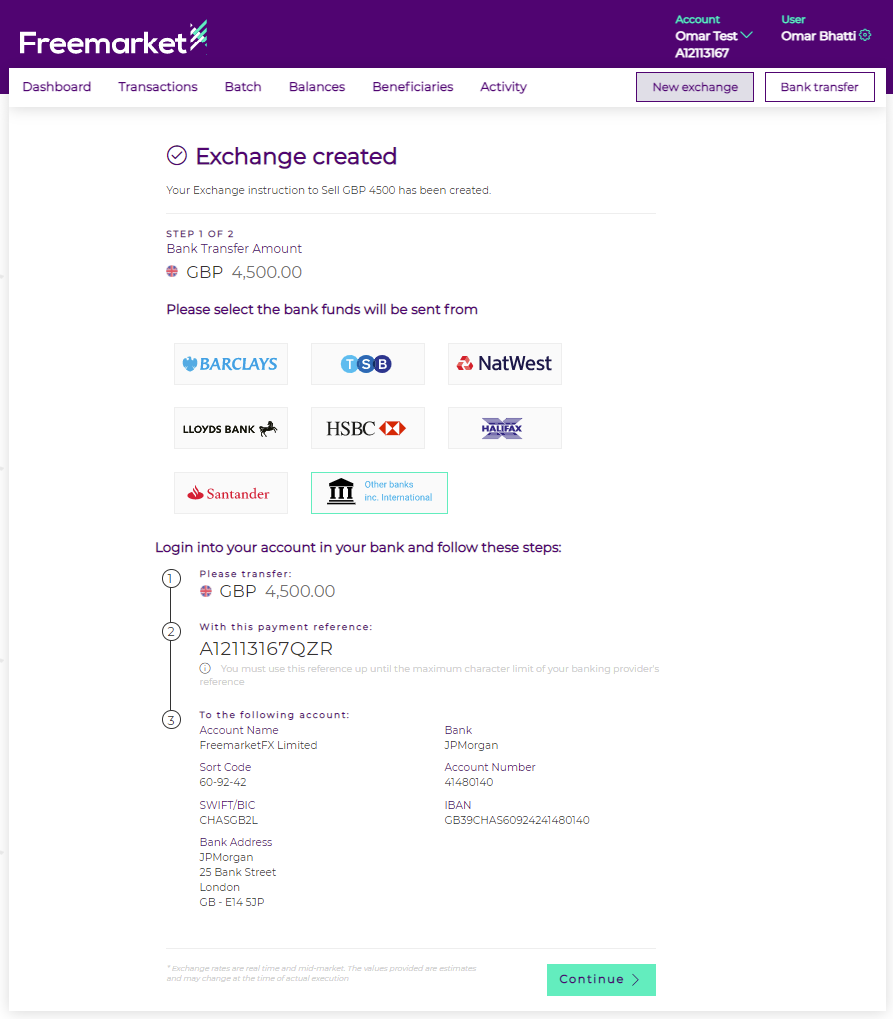
Following your selection on a bank, you will see some transfer instructions and a connection to that bank's website (if available).
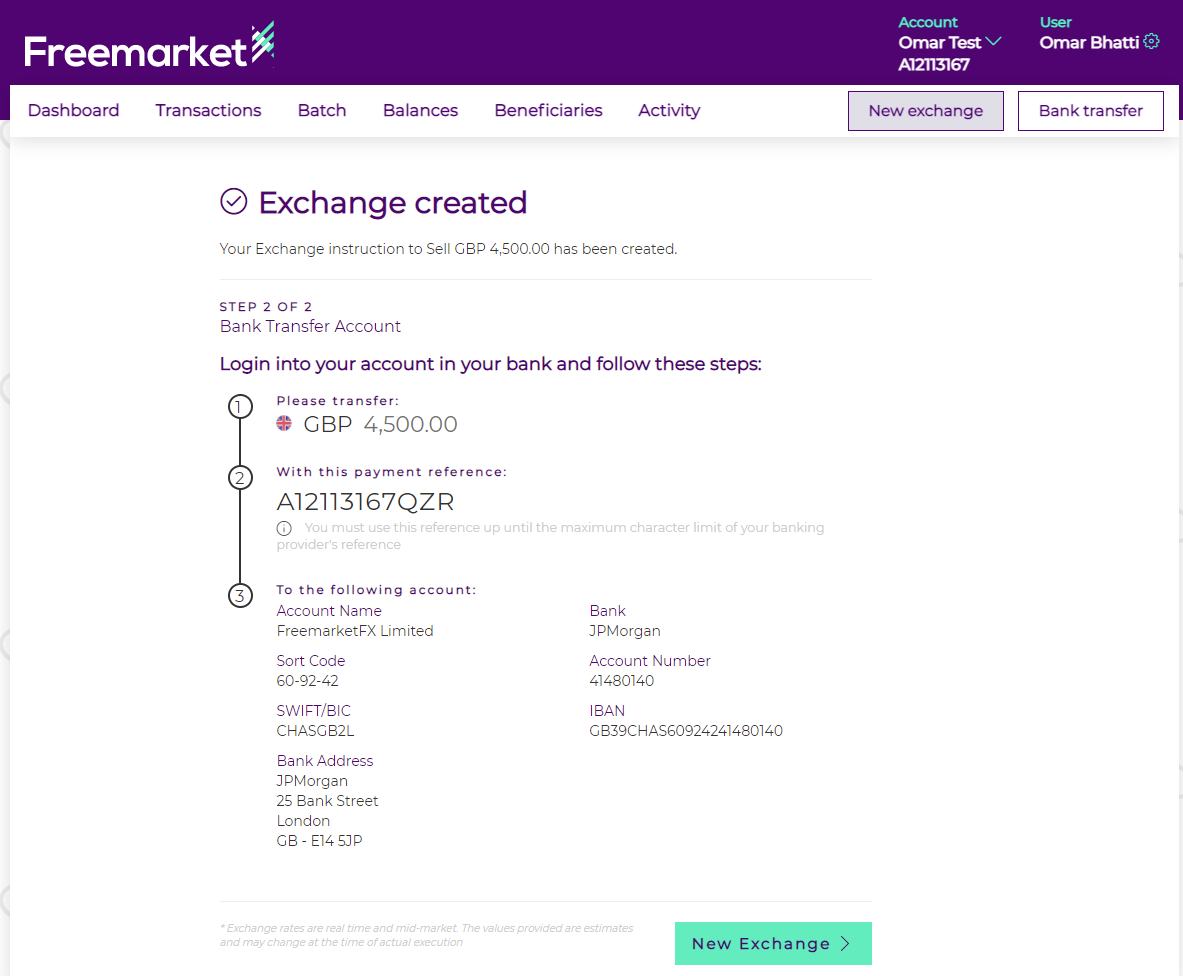
Alternatively, a transaction confirmation screen should show in place of the transfer instructions if you already have enough money in your account.
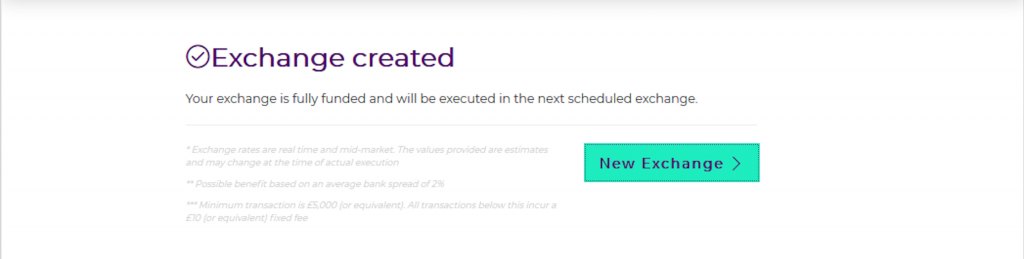
Once the transaction has been completed, you will receive a confirmation email with an exchange summary file (typically within one day, based on the currency and time of transaction). The funds have been distributed and are now in your beneficiary's account after the trade was concluded.